Steamed Cakes

Hi dear Blog. It has been almost a year again since my last post so I suppose it’s time for an update. I will strive to maintain you a bit more than I have done. However, for some time now I’ve lacked the inclination to maintain blogging but that is no fault of yours. At any rate, it’s good to have my favourite recipes compiled together and I hope they will be useful for other people.

The recipe below is for Steamed Cakes and is one of my mother’s. For me, steamed cakes are one of those comfort foods that bring me back to childhood and one that I often make for family gatherings, especially for little kids’ birthday parties.

The seasons are changing now and as we leave behind bright sunny Summer and welcome the cold, drizzly Autumn, my craving for comfort food has returned.

I also bring some of our traditional dishes to work and I may bring a batch of these steamed cakes soon.  I work for a charity organisation that supports people with disability.  It is for me something I love. I’ve been doing volunteer work since I was in high school and have always wanted to work in the community sector. A job that allows me to do this which also focuses on promoting social inclusion and diversity is something I always dreamed of. However the sector is also changing with the introduction of a new, national insurance scheme for people with disability.   

The fortunate thing for me is that I live at home so at the end of a long day, a most beloved and comforting sight is there to greet me (my mother) along with warm, comfort food which she has already cooked.  I’m very blessed that for me cooking is something I do optionally and as a hobby (although this has resulted in you dear Blog becoming somewhat neglected).  At any rate, on to her recipe for steamed cakes:

mayyoucookitricecakes

Ingredients

1/2 cup melted butter
3 cups self raising flour
1  1/2 cup white sugar
2 eggs
2 cups water
1/2 tsp baking powder

Instructions

  1. Cream together the sugar and butter.
  2. Add the eggs one at a time, mixing well after each addition.
  3. Sift the flour and baking powder together.
  4. Add the flour and water, beginning and ending with the flour. The batter should have the consistency of a pancake mixture.
  5. Pour into individual moulds and steam for about 15 minutes or until a skewer inserted in the middle comes out clean.

Serve warm with butter or a little bit of cheese.

Note:  

The recipe above is for basic steamed cakes to which you can add your preferred flavourings, eg. vanilla extract, lemon extract etc. 

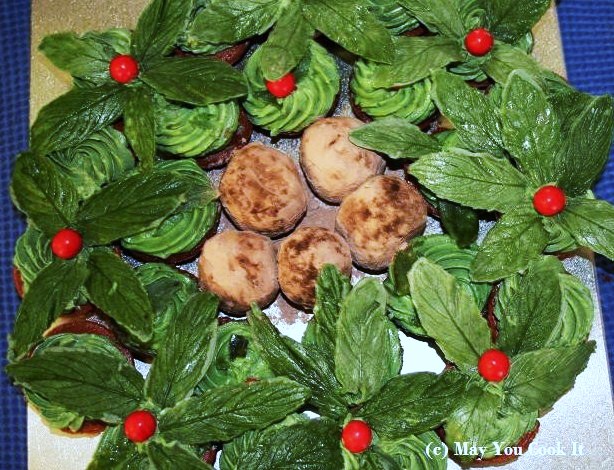
In the picture above, I had made  buko-pandan, yam and strawberry steamed cakes.

To make this, just divide your batter into three separate bowls. Add buko-pandan extract to the first bowl, yam extract to the second bowl and strawberry essence in the third bowl before pouring them into the individual moulds and steaming. 

This I Believe…

Yes, this is a food blog. I am a self confessed, incurable, incorrigible, “foodie”. To a large degree this translates into a deep joy in relishing food from a physical perspective. Putting together a bunch of seemingly random ingredients, giving way to creativity and imagination to make a satisfying, good looking and delicious result. However, more than from a physical sense,  I find  satisfaction and nourishment in food from a spiritual perspective.

Since this is my own blog and I choose what to post in it (yay me!), I thought today I would post a bit about one of my favourite soul foods…music! For me, music, particularly Christian music is a necessary part of my daily experience and feeds my spirit more than physical food sustains my body.

One of my favourite radio stations to listen to is Hope 103.2. If you’re in Sydney then you just tune in to 103.2 in your FM dial. Otherwise, you can listen online to the radio’s podcasts. It’s a great source of Christian and contemporary music. I also love listening to the Daily Devotionals with  Pastor Chris Witts which you can subscribe to in iTunes (which totally works for me as my iPhone is usually where I am).

I don’t have as much time these days to take photos of, and document,  my cooking attempts. However this gives me more time to share some of my favourite spiritual food with you instead. Like this song “This I Believe” from The Creed.

I heard this song from Hope 103.2 not too long ago and it has become a new favourite. I just found it on http://www.youtube.coom to share with you as I don’t know how to it link to iTunes. I hope you enjoy this nourishing meal!

Potato Gratin

It’s Winter again and yes, I know it’s been over a year since my last post. For anyone who reads this blog, (yes, this means you!) sorry for the long delay. No, I didn’t drop off the edge of the earth (thankfully!) and I am still alive and breathing (thankfully!!).  I’ve been a bit busy and I have to admit I haven’t felt inclined to write in a while. Dear old blog…maybe I didn’t update you “quite as often as I could have”… but you were ….*sometimes*… on my mind, hehe.  Anyway…I didn’t forget you and here I am again.

After a pretty warm and mild Autumn, Winter is starting to settle in and wrap Sydney around her cold, windy, drizzly blanket. And, as always, the chilly weather is making me crave warm, comfort food.

Potato Gratin is one of those comfort foods. It’s familiar (we go way back since Primary school days), tastes delicious and it’s consistent (no matter where you are or how old you are when you eat it, it will always taste about the same…which is comforting).

To make the potato gratin, you’ll need:

About 4 medium Yukon gold potatoes, sliced thinly

About 1 cup reduced fat cream or skim milk, warmed.

1 cup shredded strong cheese (I like aged cheddar, colby or gouda)

About a teaspoon of Rosemary or your favourite herb mix

1 clove of garlic

Salt and pepper.

May You Cookt It |Potato Gratin

  1. Preheat oven to about 180 degrees celsius.
  2. Halve the garlic clove and rub the sides and bottom of the baking dish with it before discarding the clove.
  3. Layer the potatoes into the baking dish in an overlapping pattern.
  4. Sprinkle with rosemary, salt and pepper.
  5. Pour the warm cream or milk over the potatoes.
  6. Cover with foil and bake for about 35 mins or  until the potatoes are tender.
  7. Remove the foil and sprinkle the cheese mixture over the potatoes. Bake for a further 10-15 mins until golden.

May You Cook It | Potato Gratin

That’s all there is to it. Very easy and so nice served warm out of the oven. It makes a delicious side dish and I usually serve it with steak and a bit of steamed vegetables. Definitely one of my favourite Winter warmers!

Mocha Chiffon Cake with Buttercream frosting

It was my brother’s birthday recently and his favorite cake is mocha chiffon. Like a dutiful little sister, I decided to make him a mocha chiffon cake for his birthday. The recipe  is outlined below which is pretty straightforward to make and tastes delicious.

For the mocha chiffon cake you’ll need:

6 eggs at room temperature, separated.

1/2 cup oil

1 cup sugar

1 tsp cocoa power

1 tsp vanilla essence

2 tsp coffee and chicory essence

1 cup self raising flour

2 tsp baking powder

1 tsp cream of tartar

IMG_4777_BLOG

1. Preheat the oven to 190 degrees celsius and grease two 9×2 inch baking pans.

2. Mix the yolks and sugar until light and creamy. Gradually add the oil then mix in the vanilla, chicory and coffee essence.

3. Sift the flour and baking powder into the yolk mixture. Mix until well combined.

4. Whisk the egg whites and cream of tartar to stiff peaks.

5. Gradually fold in the egg whites into the yolk and flour mixture.

6. Pour  the batter into the prepared pans and bake for about 25 mins or until a skewer inserted into the center comes out clean.

7. Leave to cool in the pan for about 15 mins before inverting onto a wire rack to cool completely.

8. Sandwich the cakes using some of the buttercream icing and decorate the exterior with the remainder. I used a blue ombre design  for my brother’s cake and topped it off with 2 large gumpaste flowers.

MayYouCookIt

For the buttercream frosting you’ll need:

1 cup butter

1 tsp vanilla essence or preferred flavoring (for this I used (surprise, surprise!) coffee and chicory essence)

3 cups icing sugar

1. Whisk butter and icing sugar until light and creamy.

2. Add the essence and a little milk if a lighter consistency is desired.

Chocolate Mousse

This  chocolate mousse  is very simple to make and delicious too. It’s a great choice when you want to make dessert in advance but don’t want to spend a lot  of time preparing it.

To make it, you’ll need:

500ml thickened cream

150g dark chocolate

1 Tbs gelatine

1/2 cup warm water

2 punnets fresh raspberries

Base:

Approx 10 digestive biscuits (or shortbread biscuits)

1/4 cup almond meal

2/3 cup melted butter

IMG_4641

1. Place the biscuits in a food processor and grind to a fine consistency. Or place the biscuits inside a ziplock bag and crush with a rolling pin until crumbly.

2.  Mix in the melted butter and almond meal with the ground biscuits then press the mixture into a greased tart pan.

3. Bake at 180 for about 15-20 minutes until golden. Remove from the oven and cool completely.

4. Mix the gelatine into the warm water.

5. Melt the chocolate in the microwave or a double boiler until smooth.

6. Whisk the cream, then gently pour in the chocolate and gelatine into the cream. Continue whisking until smooth.

7. Pour the mixture into the cooled base then place in the fridge to set for 1-2 hours.

8. Remove the mousse from the pan and garnish with fresh raspberries before serving

Egg Pie

Egg pies are one of those kinds of dishes that take me back to my childhood. I used to love eating egg pies, especially when they were cool, straight out of the fridge. I never could figure out why I grew out of them, but for some reason, I haven’t really hankered after them over the last few years. That changed last night when I suddenly had a craving for a slice of cool, soft, creamy egg pie.  That the craving would come in the evening when all bakeries are closed is just typical of my cravings which always seem intent to achieve maximum inconvenience for me. There was nothing for it but to head to the kitchen and whip up a batch. It was delicious though and I think I will stock up on some ready-made pastry shells or short crust pastry for next time. The recipe is pretty simple but making the pastry from scratch can take some time.

Egg Pie | May You Cook It

Ingredients

Preheat oven to 200 degrees celsius.

DOUGH

2 cups plain flour

2/3 cup shortening

1 tsp salt

1 tsp vinegar

1 egg yolk

About 1/3 cup ice water
FILLING

1x  375ml can evaporated milk

3 large eggs

1 stick softened butter.

1 cup sugar

Vanilla essence

Lemon zest


Instructions

Dough:

  1. Blend flour and salt in a bowl. Cut in the shortening using a pastry cutter.
  2. Combine the vinegar, water and egg yolk. Gradually add it to the flour mixture and knead the dough well.
  3. Leave the dough to rest about 30 mins.
  4. Roll out the dough to fit into a 16 inch pie plate with about 2 inches extra for the sides.
  5. Press the dough into the pie plate and allow the sides to hang over the pie plate. Press out the crust around the sides and cut off any excess dough.
  6. Set aside.

Filling:

  1. Whip the eggs then mix in the remaining ingredients.
  2. Pour the mixture into the pie crust.
  3. Bake for 15 minutes then reduce the heat to 180 degrees celsius. Bake for another 15-20 minutes until cooked (you can test it by inserting a toothpick in the custard- if it comes out clean, the pie is ready).

Stir Fried Vegetables

Stir frying is a general term used to describe a Chinese cooking technique (chǎo) which involves heating a small amount of oil in a wok before adding spices then frying meat and/or vegetables while tossing the ingredients swiftly together. The term was first penned by Buwei Yang Chao in her book How to Cook and Eat Chinese and has since become a conventional description of many other Asian dishes using a similar style of cooking.

I love the tastes and spices in Chinese cooking and I particularly enjoy the light and fresh flavour of this recipe. Its good to have as a side dish but is also delicious on its own.
Stir Fried Vegetables | May You Cook Iy

Ingredients

3 tablespoons sesame oil
1 tablespoon minced ginger
Sliced cuttlefish balls (optional)
about 1 cup chopped Chinese broccoli
about 1 cup chopped zucchini
about 1 cup chopped carrot
about 1 tsp fish sauce
about 2 teaspoon Shaoxing wine
1/2 tablespoon sugar
1 tablespoon corn starch
6 tablespoons water

Instructions

  1. In a small bowl, combine the Shaoxing wine, sugar, water, cornstarch and fish sauce
  2. Heat the wok and add the oil. Add the ginger and stir fry until aromatic.
  3. Add the cuttlefish and swiftly stir fry until cooked. Add the remaining vegetables and stir quickly.
  4. Add the sauce into the wok and stir until the sauce thickens.
  5. Transfer the vegetables into a dish and serve immediately.

Mixed Paella

For last night’s New Year’s Eve dinner, I decided to make Mixed Paella. The Paella is a rice dish that originates from Valencia, Spain. Although many forms of the dish exist, there are three types which are generally more well known, namely the Seafood Paella, Valencian Paella and the Mixed Paella.

The Mixed Paella is comprised of a mixture of seafood, meat, rice and vegetables. It’s a very delicious, festive and colourful dish. Ideal for celebrating the new year 🙂

The Paella is traditionally cooked in a paellera (a flat round pan with two handles)  over an open fire and is served directly from the pan. If you don’t own a paellera, you can use a similar kind of flat pan which should also work fine.

Mixed Paella | May You Cook It

To make this Mixed Paella you’ll need:

12 mussels

12 fresh tiger prawns

2 crabs

2 cups water

2 skinless chicken thigh fillets, cut into serving pieces

4 chorizo sausages, cubed

2 tsp smoked paprika

1/2 green capsicum, chopped

1/2 red capsicum, chopped

3 cups medium grain rice

6 cups chicken or fish stock

1 can peeled tomatoes

1 onion, chopped

2 cloves garlic, chopped.

1 tsp saffron

olive oil

Salt and pepper

1 medium lemon, sliced.

  1. Clean the mussels then place in a large pan with 1/2 cup of water. Steam until the shells open discarding any that remain closed. Set aside.
  2. Place the crabs and 1 1/2 cups or so of water in a separate pan and boil until cooked. Set aside.
  3. In your paellera (or your alternative cooking/serving pan)  heat about 4 Tbs olive oil and brown the chicken. Set aside and keep warm.
  4. In the same pan, cook the  chorizo. Transfer to a plate when cooked and keep warm.
  5. Add the prawns and cook for several minutes until the colour changes. Transfer to a plate  and cover with foil.
  6. Sauté the garlic and onion.
  7. Add the chopped capsicum, tomato, rice and paprika. Stir until combined then reduce the heat to medium low.
  8. Add the saffron and 2 cups of the stock. Stir the rice until combined.
  9. Add the chicken and chorizo along with another 2 cups of the stock. Simmer for about 5 minutes.
  10. Stir in the remaining stock and simmer for a further 10 minutes or until the stock is absorbed. Season with a little salt and pepper to taste.
  11. Stir in half the prawns.
  12. Quarter one crab and stir into the rice. Keep the other for garnishing.
  13. Arrange the crab, prawns and mussels on top of the rice.
  14. Turn off the heat and cover with a clean tea towel or with foil. Set aside for about 15-20 minutes.
  15. Garnish the dish with a few pieces of sliced lemon before serving.

Honey Mustard Salmon

It’s been a while since my last post as I have not had a lot of time (or to be honest, inclination) to blog over the past year. I had considered the idea of giving up food blogging altogether, but as it’s not generally my nature to give up something I have started, I decided that all it and I needed was a break from each other. I think occasionally, I need to take some time away from my passion in order to maintain my interest in it.

At any rate, here I am, back writing about one of my favorite topics. I’m also in the process of importing much of the content from an older blog into this new wordpress one. I don’t believe this recipe was transitioned, but as it is one of my favorite fish recipes, I will re-post it instead.

I don’t eat enough fish because I have very carnivore tastes. It usually takes a good slab of steak sizzling on the grill or lamb cutlets cooking over a barbecue to make my taste buds sing.

Although I don’t usually prefer fish if meat is an alternative, I really enjoy the delicate taste of salmon. This recipe for  honey mustard salmon  is super easy to prepare and is deliciously succulent. Although my  taste buds never burst into spontaneous song when I eat fish, it does hum a tune for this lovely salmon.

Hone Mustard Salmon | May You Cook It

Ingredients

4 Salmon cutlets

Approx 2 Tbs dijon mustard

Appox 2 Tbs honey

Approx 2 Tbs extra virgin olive oil

1 medium lemon

Salt and pepper

Instructions

  1. Combine the mustard, honey and olive oil.
  2. Zest the lemon and add the zest and juice to the honey, mustard and oil.
  3. Rub salt and pepper into the salmon cutlets then add to the marinade. Refridgerate at least 30 mins.
  4. Preheat oven to about 200 degrees celsius and bake the salmon for about 15 mins or until golden and flaky.

Serve with steamed or stir-fried vegetables.

Pavlova

The Pavlova was created in honor of the Russian ballet dancer Anna Matveyevna Pavlova after she toured Australia and New Zealand in the 1920’s. She was a renowned dancer, lauded for her grace and beauty. During the peak of her popularity many chefs would create desserts in her honor to coincide with her visits to their countries. Not surprisingly, these desserts would generally be light and airy to reflect her dancing style – eg. meringue based desserts, lights cakes and jellies.

The traditional Pavlova is one such dessert. However, there is some uncertainty as to whether it was first created in New Zealand or Australia. Anna Pavlova toured New Zealand in 1926 and Australia in 1929. Some food writers claim that before her 1926 visit, a recipe had been published in New Zealand for a fruit filled meringue pie. A chef in the hotel she had been staying in apparently used this recipe but created the augmented base after being inspired by her ballet tutu. However, in 1935, a hotel chef Herbert Sachse from Western Australia apparently claimed that he created the modern Pavlova after building upon a recipe for a Meringue Cake which he saw in the Women’s Mirror Magazine April 2, 1935 edition. This recipe was submitted by a contributor from New Zealand. It appears though, that Sachse was the one who actually named the new recipe Pavlova after he noted that the dessert was “as light as Pavlova”*. Consequently, the modern day Pavlova is an iconic dessert claimed by both countries and is a national dessert for both.

As its namesake suggests, it is incredibly light.  It’s a lovely dessert, particularly on a warm summer day. Today is also Australia Day and to honor this special day, I thought I would make this traditional Australian dessert. Ahhh…a restful day off, a cold drink and a slice of Pavlova….all I need now is to find a nice spot “under the shade of a coolabah tree”* and there’s little else I could ask for.

MYCI_Pavlova2

To make the Pavlova you’ll need:

6 eggwhites
1 Tbs cornflour
1 tsp cream of tartar
1 cup caster sugar
1 teaspoon vinegar
Vanilla essence
400ml thickened cream
1 punnet strawberries
2-3 kiwifruit
1 punnet blueberries.
1/2 cup strawberry jam.

  1. Preheat the oven to 200 degrees celsius.
  2. Beat the egg whites and cream of tartar until soft peaks form. Gradually add the sugar and continue beating to a stiff peak. Add the vinegar then mix in the cornflour and vanilla essence.
  3. Line a cookie sheet with baking paper and pour in the meringue.
  4. Reduce the oven to 100 degrees and bake the meringue for about 1 hour. Turn off the oven and open the door slightly when the meringue is baked – leave it to cool completely.
  5. Carefully transfer the cooled meringue onto a serving platter.
  6. Whip the cream using an electric beater and pour over the cooled meringue base.
  7. Top with the sliced fruits.
  8. Heat the jam for a few seconds in a microwave then glaze the fruits with the melted jam.

Macarons

What is deliciously light, chewy, and can almost always guarantee a smile no matter how long or grey the day may be? What else but theMacaron ? The Lindt Chocolate Bar serves delicious macarons. I love to sink into one of their comfortable chairs with a coffee and macaron as the stress of the day is slowly replaced with contentment.

The macaron was arguably introduced to mainstream Sydney by superstar patissier Adriano Zumbo during his appearances in Master Chef Australia. Since then, his inner city cafe has become a mecca for foodies, pastry lovers and macaron seekers of all kinds.

The modern macaron that Adriano Zumbo introduced was developed by Pierre Desfontaines from the French pâtisserie Ladurée *. It consists of two almond meringue shells filled with buttercream, ganache or jam filling. When I first considered making them from scratch, I decided to reconsider that notion and examine it. They are notoriously difficult to make and require a lot of patience and perseverance. The thought of making these delicate brightly colored biscuits intimidated me. What if I put in all this effort only to have a batch of cracked, deflated cookies? Is it really worth the time and energy? Why bother making them when I can buy them from someone who knows how to make them already? But there the turning point lay – if I let this fear of failure stop me from trying to learn how to master the macaron, then I will spend the rest of my life never knowing this skill. The macaron loomed in my mind, a neon tinted fancy mockingly bwaking chicken…chicken.. ch-ch-chicken! I made up my mind. It was time to roll up my sleeves and get to work.

To make the macarons you’ll need:

Macaron Shells:
3 cups sifted icing sugar
3 cups ground almonds
5 egg whites (aged)
1/3 cup caster sugar
½ tsp cream of tartar
Flavouring and food colouring

Chocolate Ganache:
125g milk chocolate, broken into pieces
Approx 100 ml heavy cream

Untitled3

  1. Separate the yolks from the whites and leave the egg whites in the fridge to age for at least 24 hours.
  2. Using an electric blender, grind the almond and powered sugar together until very fine.
  3. Using an electric mixer, whisk the egg whites until foamy. Add the cream of tartar and keep whisking until soft peaks form. Gradually add the sugar and continue whisking until the sugar has dissolved.
  4. Stir in your preferred coloring and flavouring.
  5. Fold the almond and sugar mixture into the egg whites. Fold carefully, making sure the mixture is fully incorporated.
  6. Spoon the mixture into a piping bag fitted with a round 5mm nozzle. Pipe 2cm rounds onto a baking sheet lined with baking paper. Set meringue aside to dry for about 45 mins (this helps to reduce cracking)
  7. Preheat the oven to 150 degrees celsius and bake the macarons for about 15 mins or until firm when lightly tapped.
  8. Allow the macarons to cool on the tray. The macarons should lift from the baking paper easily, but if the bottoms are a little sticky, use a sharp knife to lift them.
  9. To make the ganache filling, heat the cream and pour it over the chocolate. Mix gently until the chocolate melts. Keep stirring until the mixture becomes smooth and creamy. Allow it to cool until the mixture thickens.
  10. Match up similarly sized macaron shells. Spoon the ganache into a pastry bag and pipe onto one half of the macaron shells before topping with the other macaron shell.

Christmas Wreath Cake

This cake is simple to make and the result is quite lovely. It was something of an experiment, and as an early attempt the results were not exactly as I had envisaged. Still, I think with practice (or if made by a more practiced cook) it has the potential to be quite beautiful. I have decided that this will be a keeper. Consequently, there may be wreath cakes sporadically gracing my family’s table throughout the year before next Christmas hehe.

IMG_3639_3

You can make it with a whole ring cake or with cupcakes. Personally, I prefer using cupcakes and in this instance I used chocolate cupcakes. To make the cupcakes, you’ll need:

1 cup water
1 cup brown sugar
100g milk chocolate
125g softened butter
3 eggs
1/4 cup cocoa powder
1 1/2 cups self-raising flour
1/2 cup plain flour

I opted for cream cheese frosting and for this you’ll need:

125g softened butter
250g cream cheese, softened
4 cups sifted icing sugar
Green icing coloring

For the leaves and berries I used:

250g white chocolate
Several bunches of mint leaves.
Green food coloring
Jaffas

Instructions

    1. Wash and dry the mint leaves.
    2. Melt the white chocolate and stir in the green coloring.
    3. Brush the white chocolate over the mint leaves or dip one side into the melted chocolate. Place on a tray lined with baking paper and allow the chocolate to set.
    4. Preheat the oven to 160 degrees celscius and grease muffin pans.
    5. Combine the water and milk chocolate over low heat, stirring until the chocolate has melted. Set aside and cool to room temperature.
    6. Beat the sugar and butter until pale and creamy. Add the eggs one at a time, beating well after each addition.
    7. Sift the flours and cocoa together. Gradually add into the sugar, butter and egg mixture, stirring until just combined.
    8. Stir in the melted chocolate and spoon into the prepared muffin pans.
    9. Bake for about 20 minutes. Turn onto a wire rack to cool.
    10. To make the frosting, beat the cream cheese, butter and vanilla until light and fluffy. Stir in several drops of green coloring and mix well.
    11. Spoon the frosting into a pastry bag and pipe onto the cupcakes using a large star tip.
    12. Arrange the cupcakes to form a circle then place additional cupcakes to make a second, inner circle.
    13. Gently peel off the leaves from the hardened chocolate.
    14. Arrange the chocolate leaves and jaffas on top of the cupcakes

IMG_3632_6

You can also place chocolate cake truffles in the center of the wreath if you prefer. To make the cake truffles:

  1.  Process the unused cupcakes in a food processor until fine crumbs form.
  2. Pour the cake crumbs into a large mixing bowl and spoon several tablespoons of the remaining frosting until the mixture forms a dough.
  3. Roll the mixture into balls and then toss in cocoa powder or dip into melted chocolate. Place the balls in the center of the wreath.

Pineapple Upside Down Cake

I broke my stand mixer not too long ago and this precipitated a need to buy a new one. I’ve wanted a KitchenAid mixer for a while now but had never bought one because it seemed so extravagant. They’re a bit costly here in Australia ranging from $650 – $1200 each. However, since I needed to replace my mixer anyway, and I want one that will last a long time, I decided to take the plunge and buy the long desired KitchenAid. I have to admit I’m happy I did. I chose the “ice” colored mixer from the Artisan range but it strikes me as more of a duck egg blue. I didn’t really want the iconic red and my eye was consistently drawn to this lovely light green/blue color. It’s a beautiful piece of equipment and I was excited to try it out when it was delivered.

IMG_3540

For its inaugural task, I decided to bake a Pineapple Upside Down CakeThis cake is the first thing I learned to bake, so it seemed fitting that it should be the first thing my dream mixer should make hehe. I was eight years old and eager to take on Yan Can Cook when I learned this recipe. Problem was, I wasn’t allowed to play around the kitchen yet. After a prolonged campaign of  pestering, I finally succeeded in convincing my mother to let me bake. We made a Pineapple Upside Down Cake together. Well, at least my mother did. I made a mess, but I did mix the batter and added ingredients every now and then.  I didn’t do much in terms of cooking that day and never did develop the skills to take on Mr Yan, but I did have a great time. Albeit under the watchful eye of my mother, who was determined to stop me from enjoying myself to the full in her constant efforts to keep me from falling off the chair, falling into the batter or burning myself, the kitchen or the house down.

This cake is pretty simple to make and very tasty. To make it, you’ll need:

2 cups self-raising flour
1 cup softened butter
1 cup white or caster sugar
1 teaspoon vanilla essence
3 large eggs
1/2 cup milk
1 can pineapple pieces
1 packed cup brown sugar
1/2 cup softened butter (extra)
Maraschino cherries

IMG_3543

Instructions

  1. Preheat the oven to 180°C and grease a 20cm round cake tin using the 1/2 cup extra butter.
  2. Sprinkle the brown sugar over the base of the tin and arrange the pineapple pieces and maraschino cherries evenly on top.
  3. Beat the butter, vanilla and sugar until the mixture is light and creamy.
  4. Add the eggs gradually, beating well after each addition.
  5. Sift the flour over the mixture, adding alternatively with the milk.
  6. Pour the batter over the pineapple, sugar and maraschino cherries.
  7. Bake for 40-45 minutes or until a skewer inserted in the middle of the cake comes out clean.
  8. Cool the cake in the pan for a few minutes before turning it over onto a plate.

pineapple

Brazo de Mercedes

Brazo de Mercedes is a traditional Filipino dessert consisting of a custard filled meringue roll. The name literally translates to “arm of Mercedes”. The origin of the dessert is unclear although the name indicates it stems from the era of Spanish colonization. I have to admit I find the name a little baffling. Why would someone name a dessert after a woman’s arm? At any rate it is a delicious dessert and one of my favorites. It’s also pretty straightforward to make. The difficulty is in applying the will power to stop eating it after one serve (well, okay…maybe after two) :-)

BDM1

Ingredients

10 large eggs, separated
1 tsp vanilla extract
3/4 C caster sugar
1/2 tsp cream of tartar
2 C condensed milk
1 tsp white vinegar
1/3 C powdered sugar

Instructions

  1. Preheat the oven to 175 degrees celsius.
  2. Combine the egg whites and cream of tartar then beat with an electric mixer until soft peaks form.
  3. Gradually add the caster sugar then vinegar. Continue beating to a stiff peak.
  4. Place baking paper on top a cookie sheet and lightly grease the surface.
  5. Pour the meringue mixture onto the baking paper and even out the surface using a spatula.
  6. Bake for about 20 minutes until the meringue turns a light brown color.
  7. Combine the egg yolks, condensed milk and vanilla in a saucepan over medium heat. Cook the mixture, stirring continuously until it thickens.
  8. Remove from the heat and allow it to cool slightly.
  9. Remove the meringue from the oven and allow it to cool for a few minutes.
  10. Sprinkle powdered sugar over the meringue and place wax paper over it. Turn it out onto a similarly sized tray and slowly peel off the baking paper.
  11. Pour the cooled custard over the meringue and spread it evenly over the surface.
  12. Carefully roll the meringue using the wax paper.
  13. Transfer the finished roll onto a serving platter and enjoy!